Posts

Showing posts from 2012

Roll Cage Progress - 1/3 Way Through

Image
Manged to drop by the workshop and see how the cage was progressing and things were moving fast. Most of the main section has been formed up and tacked together.      

Framed Fast Fours article

Image
Michele surprised me for XMAS and gave me a framed printed version of the Fast Fours article from October. I was amazed at how good the framing place had done and also of the print quality that Michele had managed to get printed out. Best XMAS present ever

Cage Progress

Image
Here is a quick shot of the cage progress i was sent today after the cage builder went on holidays this week he got back early and cranked out some cage building. I checked in with him to see if he was back yet and he replyed with this photo to my surprise, checking it out in the flesh tomorrow.

New Tools

Image
So on holidays i did some shopping and picked up some new tools to use, i found another Total Tools store and also went and check out Jaycar.

Dropped off the car to get cage fitted

Image
Dropped the car off to get the cage fitted today, wont be the same.....   

Go Jack - Rack

Image
Got sick of having the go-jacks laying around when not in use so took a visit to Bunnings and made up a rack to put them up and out of the way. 

Preparing for new roll cage - Three

Image
So this afternoon when it cooled down a bit and with some help from James we stripped the rest of the inside.   Removed the firewall matt  The weight of the matt was

Picked up a Vice

Image
Today after a fair while doing without i bit the bullet and picked up a vice for the bench, it is an Irwin vice and is able to swiwel, and spin and also has the pipe jaws.   Here i am putting it in  Also snapped up this set for $20

Preparing for new roll cage - two

Image
Pulled out the carpet and all the bits and pieces tonight  Forgot about

SAU Nationals 2012 - Goulburn - Video Footage

Image
Footage From Track Day SAU Nationals Footage One Lap - Sixty Two Seconds - Twenty Twelve Wakefield Park 1:02.2 Lap - Sau Nationals - S14a   Footage from Show & Shine   Footage From Goulburn Airport Airport In Car Footage Run 2   Russman Launch Racepace R33 GTR Launch   R33 GTR Launch

Preparing for new roll cage - stripping interior - one

Image
tonight after getting home from work earlier then i have in a long time i decided to strip the interior so i can look at getting a full cage put in.     

SAU Nationals 2012 - Goulburn NSW - Thursday & Friday

Image
  The SAU Nationals rolled around again this year and after heading down to Winton last year and having issues with the car and only making one or two sessions i was determined to make it to this years event which was being held in Goulburn NSW. Last year @ Winton they had a Track Day and then a Show and Shine, this year they added in a 800m drag event @ the Goulburn Airport which was sure to be lots of fun. The event was pre-sold to SAU members and then opened up to the rest of the community but with very little spots left the event sold out very quickly I took the Thursday off work to organise everything to head down, unfortunately at the last minute James who was meant to come along as well had to pull out as his car was not complete. It was a real setback for him and much disappointment however it means that he can take the time to get things right.   So without James Michele and I headed down and we were lucky enough to be able to get to Wakefield on th...

Installing Caster Rod Brace

Image
  Pretty simple job to install the castor rod brace, i think

Rear Diffuser Two

Image
  So starting from scratch again almost i preped the surface and ended up glassing the mould with a layer of glass to strengthen it as it was moving slightly and developed cracks. The reason was if i wanted to make another one i could.     I bascially

SCA folding stand and 2 x go-jacks

Image
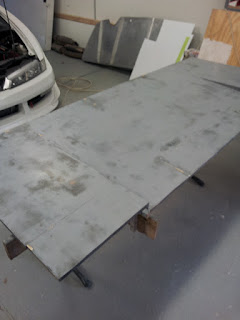
SCA at the moment has a sale on and i picked up this folding table for $30 which is a bargain and also they had the Go-Jacks @ buy one get one free. I have two already and this will allow me to move the car around easily in the garage 

Borg Warner EFR 6758

Image
Picked up my new turbo and manifold today Pretty cool all the stuff it comes with

Fast Fours Article - October 2012

Image
Here is a shot of the front cover of the magazine, pretty cool shot

gktech castor rod bar, subframe weld in reinforcement plates & Eccentric lockout kit

Image
gktech had a bit of a sale i noticed and i bought some stuff on an inpulse. Arrived quickly and looks nice.  Castor brace, paint is

Rear Diffuser - Part One

Image
 So after playing around with fiberglass and making up the brake ducts and oil cooler duct i thought i would give it a try again and be a little more advanced,   First up i traced the shape of the current metal rear diffuser onto some ply i had lying around so i could match it to the rear bar.   I added in some of the holes and attached the

Dash Surround

Image
Dash surround painted up in a matt black colour Dried and ready to install

Ducting Update

Image
So i am up to the prep and painting today, sanded back the hi fill and coated the parts in a flat black color.  They came out ok but got some drips on the

Brake Ducts - Part four

Image
So the next piece of the brake ducts it attaching the duct somewhere so it can direct cool air into the center of the brake rotor. I was lucky enough to have an old caliper mounting bracket so could use this to would out the spacing holes for the bolts. I had some left over sheet from another job and it was thick enough to use and would be ok for the job. Here i have cut out the shape with the

Preparing Ducts for Paint

Image
Went a little crazy with the filler today probally way too much and over everything when i really didn't need to.

Intercooler Duct - Part One

Image
Playing around if i will remake the front intercooler to radiator duct again. Currently is made out of light stainless sheet. Not 100% sure if i will or not yet but thought i would mold the actual front bumper duct whilst i had everything out and make a decision latter. I framed it up with some core flute and

Front Brake Ducts - Part Three

Image
With one coat of resin on they were ready to glass over the top

Oil Cooler Duct - Part Two

Image
Here the duct is in position with the bar removed, i didn't like how it fitted against the cooler core so decided to further change the design and wrap some of the duct around the edge of the core as well as add in some mounting tabs that mount to the oil cooler core frame. The taped section below is setting up to glass over it. Here you can see the first lot of glass on and dry with the mounting tabs on, i tried to cover up all of the tabs and then cut out the section needed to put the bolt through latter as it was too fiddly

Oil Cooler Duct - Part One

Image
So at the same time as doing the brake ducts and center console the other job i have been putting off for a while is ducting the oil cooler to the front bar. This is quiet tricky as i have to get the shape of the front bar and also flow it back to the cooler so it meant i needed to take the front bar off. Here i am masking up the section and have added a flat piece at the top which is just under the indicator, this will be the top of the duct as above this is the brake duct. All glassed up, this was not as fiddly as the brake ducts but i still needed to be careful i didn't get

Front Brake Ducts - Part Two

Image
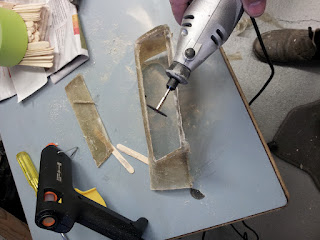
So here you can see i am cutting the back of the duct out which was fully glassed up Hot melt gun and paddle pop sticks and i used a caulking gun silcone section just cut off the end for what the ducting will go over. Positioned it to where i wanted it and glued it down

Fiberglass Center Surround - Two

Image
So after glassing up to get the shape of the dash and letting it dry i pulled out the piece and added in some filler and another coat of glass. Here you can see everything ready to go and i just need to add in the catalyst All glassed up with the filler foam in and another layer or two of glass on top.

Front Brake Ducts - Part One

Image
So i got a bit motivated today and wanted to get some jobs i had been planning for donkeys actually started and maybe done. First off the ranks was fixing the cooling issue to the brakes. With the front splitter i think that the front brakes are getting far less air then what they used too and the front rotors seem to get more cracks in them, i think also going quicker is some of the issue but never the less i needed to sort it out. I wanted to make something neat and that fits into the vertex ridge kit which meant buying something off the shelf was not going to work so i decided to make it up myself. Here i am taping up the section i am about to fiberglass, i also waxed the tape just to be sure and spent a lot of time sealing all the edges etc so i didn't get too many leaks from the resin.

Fiberglass center surround - One

Image
I have had a piece of aluminium covered with black vinyl wrap for some time and it isn't the nicest looking piece. I originally intended to modify the factory surround but somewhere along the line i lost it and the aluminium has been in it's place. This morning i started to fiberglass the surround and build up the thickness so i can eventually high fill and cover with carbon vinyl wrap. Hope it will all turn out OK as this is my first time playing with fiberglass

New sway bar mounts fitted

Image
Fitted the new sway bar mounts today  I can't put the locking rings on as

Front sway bar mount bushings - need replacing

Image
the front sway bars have been in the car for a fair few years now and i thought it might be a good idea to have a close inspection of them to see if they were OK and then maybe grease them up again. Upon closer inspection it seems that have flogged out and are in need of replacing, you can see the cracks in them which is not good.

Fitting Sway bar lateral locking rings

Image
Fitted the whiteline sway bar lateral locking rings after noticing that my sway bars were moving around too much and fouling the links. Rear Links

Heli-Coil Thread - fixing rear sway bar mount

Image
Drilling out the thread that was stuffed.  Nice and cleanly drilled out

Heli-Coil Kit

Image
Picked up a heli-coil kit from E-Bay, decided to purchase a kit with a few different sizes as it was not much more and you got a lot of different pieces in it. Now to fix up the sway bar mount.

Sway Bar Mount - Bolt missing

Image
So un-be know to me, whilst at wakefield it seems that the rear sway bar mount bolt had fallen out..... Trying another bolt i found the thread was too far gone and i need to heli-coil it to fix it up.

Video from Wakefield Park 1:02.4 lap

Image
Video from Wakefield Park

New Wakefield PB 1:02.406

Image
Went to Wakefield Park today, the day was very cold and windy with rain the day before leaving pools of water throughout the pit and garage area and sections of the track having running water going across them. The forecast wasn't looking too bad before the day so turning up in the morning this was a big downer and i was not very hopeful of getting any good times. First session was a passenger session and

Rear sway bar link - threaded bolt

Image
whilst under the car today picked up this bolt on the sway bar link i had forgotten about, it is threaded and can't be fully done up. Need to see if i can get the thread fixed that is in the subframe.

Fixing Exhaust

Image
Dropped into Castle Hill Exhaust this afternoon to get the flanges modified on my current exhaust. They are the Japanese style and have bent over time meaning they don't seal properly and i constantly have issues with leaky gaskets. Here are the flanges cut off New flange on

Wheel Alignment and fit new tyres

Image
Dropped into Bob Jane in Hornsby today to get a wheel alignment and to strip and fit the new second hand tyres i picked up last week. Had a little drama as they were apparently too busy to do the alignment and wanted to leave the car there for the entire day but worked it all out and got the tyres swapped over and alignment done. Noticed one of the tyres i picked up must have been from the Scorch Racing S15, how cool is that :)

Oil Temp Sensor and Ride Height

Image
The oil temp sensor wiring looks to have cooked itself and grounded out so i have been getting errors through on the DL1 and the temp is reading incorrectly.  Pulled it all apart tonight and pulled through some new wires to wire it up tomorrow as i need another plug. Also need to fix the horn as it fell off whilst @ Wakefield  Adjusted all the ride heights again and hopefully they are correct and i can get an alignment. The hard thing is the heights are different on the shock body so you can't just adjust them all the same and the ride height is correct. This means lots of adjusting and playing around so will try and get it finished tomorrow night

Picked up some second hand tyres from WTA

Image
Picked up some second hand tyres from Gordon Levin. They are the 295/35 R18 soft A050's and most likely only used for a couple of laps. $200 a tyre was too good to pass up

Wakefield Speed Off the Streets Day

Image
Ducked down to Wakefield today to get some laps in and check if the gearbox issues had fixed itself. Tried out the new spacers as well. Gearbox performed flawlessly with

Exhaust Gasket Issues

Image
My exhaust is a mix and match from over the years and the cat pipe's flanges are a different size to the front pipe/cat back sections of the exhaust. The last time

Front splitter Starting to bow

Image
noticed tonight the front splitter is starting to bow, not sure if it's from repeated hits or is the fiberglass sagging over the foam core. It is hard to get a photo of it but looking at it with the naked eye it is easy to spot and sagged buy 5 or 6mm either side

New Hubcentric Spacers

Image
Gone to a 25mm front spacer and 20mm rear

MCA S13 Suspension - Up Close

Image
Managed to get some photos of the MCA's car suspension set up, amazing the work they have done and how cleverly they have

WTA Day 2 - Saturday

Image
Saturday and grabbed a photo with Nob :) Cyber car in a little trouble

WTA Day 1 - Friday

Image
Fridays WTA  Some close up shots of under the Scorch car

WTA Practice Day - Thursday

Image
Went out to the WTA practice today Photo of the Suttons S15 all finished Love this thing, so

Motor Ex with All Star's, Zen Garage and The Lowdown.com

Image
Dropped off the car this afternoon to Motor Ex to go on display with the JDM Allstars, Zen Garage and The Low-down.com's booth. Car looks great and the show wil be amazing with a large amount of various cars.

Sydney Motorsport Park - New Pit Garages Being Built

Image
Out at Sydney Motorsport Park today and saw the new pit garages being built on the short circuit, looks great and can't wait to have a crack at the new track

Photo Shoot with Fast Fours

Image
Got some shots on the camera phone this morning of the photo shoot with Chris from Fast Fours magazine, car looks amazing after being detailed by Eugene from JDM detailing. Can't wait to see the actual pictures as what i saw on his camera was amazing, coming out in October's edition apparently.